
 Gamer · October 29, 2026 · ~5 min read
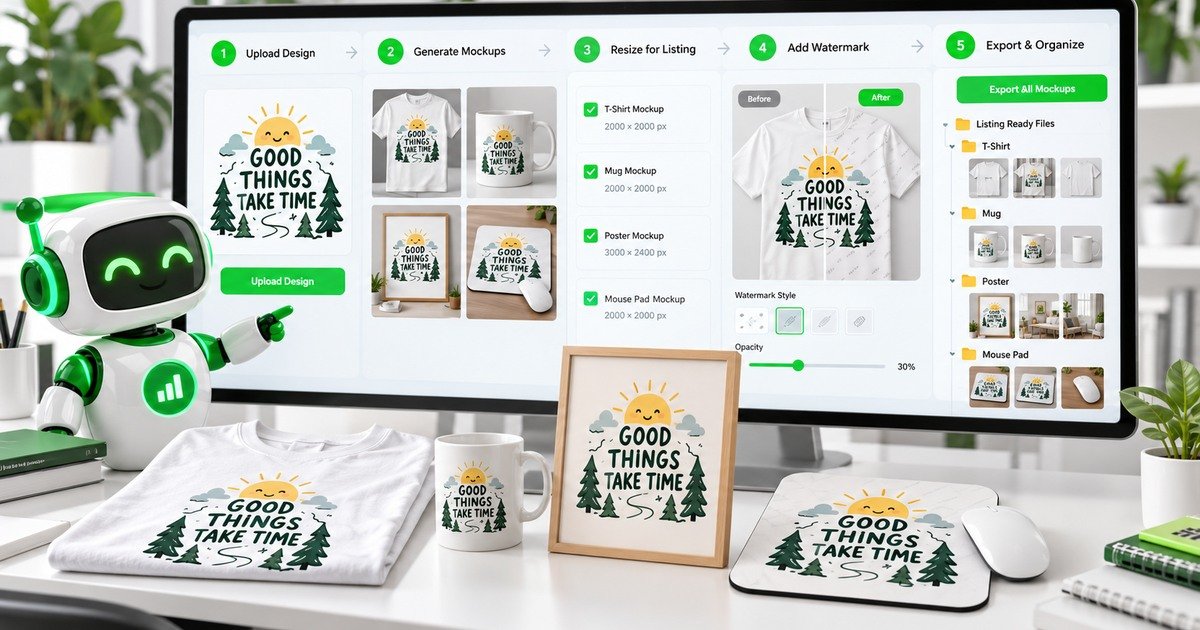
The slow part of product images is often not one mockup—it is the repeated chain after it. Create the scene, resize it, convert it, rename it, decide whether to watermark it, place it in the correct product folder and upload it. Across hundreds of designs, small manual steps become the bottleneck.
This guide turns that chain into a repeatable Etsy listing image workflow with PodBulk. It also separates the clean master from marketplace derivatives, so one platform decision does not damage the original asset.
The workflow
- Prepare final design files.
- Prove the PSD Smart Object target.
- Generate mockups in bulk.
- Approve clean master images.
- Resize, crop or convert copies for the listing.
- Decide on watermarking using current marketplace guidance.
- Organize files by product or design.
- Inspect the primary thumbnail before uploading.
Start with a file map
Decide where every stage belongs before processing. A simple structure might include 01-designs, 02-psd-templates, 03-proof, 04-masters, 05-etsy-ready and 06-archive.
Keep designs and PSD masters read-only whenever possible. Generated files should never overwrite the sources.
Generate the mockup from your own PSD
Choose Auto detect when the template has one unambiguous Smart Object, Focus for one exact case-sensitive name, and multiFocus when the same design should fill every object sharing a prefix such as mock_. Hidden objects count, and nested folders are searched.
Run a proof with a light, dark and high-contrast design. Check masks, perspective, shadows, crop and colour. Only then expand to the full batch. The 1,000-mockup workflow explains the design × template matrix.
Keep one clean master
The master should be the largest approved image with no marketplace-specific crop, badge or watermark. Do not repeatedly open and resave the same JPEG. Generate derivatives from the clean master so future changes do not require rebuilding the mockup.
Name it with the design and scene: sunrise-014__mug-white-front__master.jpg. A predictable name connects the visual to the listing.
Resize and crop in bulk
Etsy currently recommends listing images at least 2,000 pixels wide. Recommendations can change, so confirm current Help documentation before a large export. Choose one consistent aspect ratio for the primary images and preview the thumbnail crop.
Use PodBulk Bulk Resize or Crop on copies. Do not stretch the image. When ratios differ, crop deliberately or add composition space in the original scene.
Convert and compress without destroying detail
JPEG is useful for photographic scenes; PNG supports transparency and crisp flat graphics but may be larger. Export enough quality for texture and product edges without treating the maximum file size as a target.
Inspect small text, fabric texture and transparent edges after conversion. Keep the master available if compression is too aggressive.
Watermarking requires a marketplace decision
A watermark may discourage casual copying, but Etsy currently warns that overlay watermarks can make photos unsuitable for some Etsy features and ineligible for certain off-site advertising. Etsy suggests incorporating recognizable branding within the scene—such as packaging or presentation—instead of placing an overlay on top.
If you still create watermarked derivatives for another channel, keep them separate from clean masters and Etsy-ready files. A bulk watermark tool should apply a deliberate rule, not permanently alter every copy.
Build the image sequence
- Primary image: one clear finished product that reads at thumbnail size.
- Alternate angle: another useful view.
- Scale or context: show how the product fits in a real setting.
- Detail: texture, print or finish.
- Options: colours or variants presented accurately.
- Information: size or process details that do not mislead.
Etsy currently allows multiple photos and videos, but more slots do not mean every listing needs filler. Each image should answer a buyer question.
Organize by design or by product
For a design-led shop, create one folder per design with all product scenes. For a product-led shop, group by product and place each design variant inside. Choose the structure that matches how listings are created.
Use a stable pattern such as designID__product__scene__channel.jpg. Bulk Rename can apply the rule after review, but identifiers should originate in the design folder.
Thumbnail QA
View the primary image small. A technically correct mockup can fail when the product occupies too little space, the design is unreadable or the scene looks like a collage. Etsy's current Search Visibility guidance favours a singular finished product as the primary photo rather than a stitched collage.
Check light and dark mode backgrounds, phone screens and cropped previews. Reject stretched designs, clipped text, halos, wrong colour and misleading scale.
Separate creation from upload
Finish and approve the complete image set before opening the listing editor. This reduces repeated upload-download cycles and makes it easier to spot missing scenes. Keep a checklist with filenames in the intended order.
Marketplace rules and interface behaviour can change. Check Etsy Help before a major upload instead of treating an old template as permanent policy.
End-to-end checklist
- Design folder contains finals only.
- PSD target and engine are tested.
- Proof batch approved.
- Clean masters saved separately.
- Etsy-ready copies meet current guidance.
- Primary image works as a small thumbnail.
- Watermark decision documented.
- Files renamed consistently.
- Product folders complete.
- Random samples checked after bulk processing.
Run the workflow in PodBulk
Start with the PodBulk mockup app, approve the PSD output, then use the image tools for resize, crop, convert, rename or watermark only where the channel requires it. Keeping the steps in one browser workflow reduces manual handling and preserves an organized master set.
For tool-by-tool details, read the PodBulk image tools guide and the Smart Object naming guide.
Official marketplace sources
Review Etsy Help before exporting: how to create a listing, how to protect listing images, and Search Visibility guidance.
See also: The Best Free eBay Bulk Listing Tool Image Workflow
Frequently asked questions
How wide should Etsy listing images be?
Etsy currently recommends listing images at least 2,000 pixels wide. Check the current Etsy Help guidance before final export because platform requirements can change.
Should I watermark Etsy listing images?
Etsy says overlay watermarks can make images unsuitable for some Etsy features and ineligible for certain off-site advertising. Consider product-scene branding or packaging instead, and verify current guidance.
Can PodBulk create mockups from my own PSD templates?
Yes. Use compatible PSD Smart Object templates with Auto detect, Focus or multiFocus, then prove the template before the production batch.
Should the main Etsy image be a collage?
Etsy's current visibility guidance favours a singular image of the finished product for the primary photo. Review the listing as a thumbnail and follow current marketplace rules.
What should I save as the master image?
Keep the largest clean approved mockup as the master. Create marketplace-sized, compressed or watermarked derivatives from that file instead of repeatedly recompressing one export.
Stop making mockups one by one
Every design on every PSD template, in one run, right in your browser. 200 free mockups a month.